
Spray vs Brush Finishes for Cabinet Painting in Fremont
Spray vs brush cabinet painting Fremont: Learn the finish, cost, and durability differences before updating your cabinets.

The difference between a paint job that looks great for three years and one that looks great for ten comes down to one thing: preparation. A homeowner in Centerville learned this the hard way. She hired a painter who offered a great price and promised to finish quickly. He finished quickly by skipping most of […]

The difference between a paint job that looks great for three years and one that looks great for ten comes down to one thing: preparation. A homeowner in Centerville learned this the hard way. She hired a painter who offered a great price and promised to finish quickly. He finished quickly by skipping most of the prep work. Within eighteen months, paint was peeling near her bathroom, patches showed through in the living room, and the whole house looked in need of repainting.
Preparation is the foundation of quality painting. What happens before the brush ever touches the wall determines how good the results look and how long they last. Rushing or skipping prep is the most common way painting projects fail.
This guide covers everything involved in proper interior painting preparation. You’ll understand why it matters, what it includes, and how to recognize whether your painter is doing it right.
Before diving into the specifics of preparation, it’s worth understanding why it’s so important. The relationship between prep work and final results is direct and unavoidable.
Paint needs a clean, sound, properly primed surface to adhere correctly and look good. When those conditions exist, paint bonds strongly, covers evenly, and lasts for years. When they don’t, paint fails – sometimes quickly, sometimes gradually, but inevitably.
The failure modes are predictable. Paint applied to dirty surfaces doesn’t adhere well and may peel. Painting over glossy surfaces without sanding may not adhere properly. Painting over damaged surfaces looks bad and draws attention to the damage rather than hiding it. Paint over moisture problems, bubbles, and peels. Each failure can be traced back to shortcuts in preparation.
Quality preparation creates the foundation for success. Clean surfaces allow proper adhesion. Repaired surfaces look smooth under paint. Primed surfaces accept topcoats evenly. The time invested in prep pays off in results that look better and last longer.
The problems caused by poor preparation range from cosmetic to structural. Cosmetically, poor prep results in visible patches, uneven sheen, lap marks, and surfaces that don’t look professionally painted. These flaws are obvious and disappointing.
More seriously, poor prep leads to paint failure – peeling, bubbling, cracking, and flaking that require repair. In extreme cases, entire surfaces need stripping and starting over. The “savings” from skipped prep become major expenses when work needs redoing.
The timeline varies. Some prep failures show immediately – patches visible through fresh paint, poor adhesion obvious within weeks. Others take months or years to manifest – gradual peeling, slow deterioration as moisture attacks poorly prepared surfaces. Either way, the cause traces back to prep.
If you had to choose between quality prep with mediocre paint or mediocre prep with quality paint, choose the prep. This surprises many homeowners, who assume paint quality is the most important factor.
Expensive paint on poorly prepared surfaces fails. The premium resins, pigments, and additives can’t overcome dirty, damaged, or improperly primed substrates. Meanwhile, mid-grade paint on perfectly prepared surfaces performs well for years.
Of course, you don’t have to choose – quality prep with quality paint delivers the best results. But understanding the relative importance helps you evaluate contractors and budgets. Never accept compromised prep in exchange for premium paint. It’s a bad trade.
Professional painting starts with assessment and planning. Understanding the scope of preparation helps set realistic expectations.

Before any work begins, good painters walk through each space and assess it. They’re assessing wall condition, identifying needed repairs, noting furniture and fixtures that require protection, and planning the work sequence.
This assessment shapes the entire project. How much prep time is needed? What materials are required? Which rooms should be tackled in what order? The answers inform scheduling, pricing, and resource allocation.
A thorough assessment prevents surprises. Issues identified upfront can be addressed in the plan. Issues discovered mid-project cause delays and potential conflicts. Professional painters invest time in assessment because it makes everything afterwards smoother.
During the assessment, painters look for any issues that need attention before painting. Cracks, holes, nail pops, water stains, peeling areas, glossy surfaces that need sanding, and dirty areas that need cleaning are all noted.
Some issues are obvious: large holes, obvious water damage, and clearly peeling paint. Others are subtle: hairline cracks, small nail pops, areas where previous repairs were poorly done. Experienced painters know where to look and what to look for.
The goal is no surprises once painting begins. Every issue identified in the assessment gets addressed in preparation. Issues missed during assessment become problems that slow work or compromise results.
Different rooms have different prep needs. Bathrooms may need mildew treatment. Kitchens need degreasing. Kids’ rooms might have extensive wall damage. Each space requires an appropriate approach.
A good prep plan addresses each room’s specific needs. It’s the sequence that works logically: repair, then sand, then clean, then prime, then paint. It allocates time appropriately based on actual conditions rather than generic assumptions.
The plan guides daily work. Painters know what’s happening in which room on which day. Homeowners know what to expect and when. This structure prevents chaos and keeps projects on track.
Before any surface preparation begins, everything in the space must be protected. Paint gets everywhere during professional painting – drips, splatters, roller spray – and prevention is much easier than cleanup.

Furniture either moves out of the room or to the center where it can be covered. Which approach depends on furniture size, available storage space, and homeowner preference. Either way, furniture can’t be placed against the walls where painting will occur.
Items that stay get covered completely. Plastic sheeting protects from paint drips and dust from sanding. Coverage needs to be complete – paint drips find any gap in protection.
Plastic sheeting works well for covering furniture. It’s waterproof, keeps dust contained, and is inexpensive enough to replace if paint gets on it. Tape edges to prevent shifting during work.
For floors, canvas drop cloths outperform plastic drop cloths. Plastic is slippery – dangerous for painters climbing ladders. Plastic doesn’t absorb drips – paint pools and can get tracked. Canvas drop cloths grip the floor, absorb drips, and can be reused project after project. Quality painters use canvas on floors.
Floor protection is critical during interior painting preparation. Paint drips happen during any painting project. Hardwood, tile, carpet, and other flooring materials all need coverage.

Hardwood floors receive canvas drop cloths that cover the entire floor area, with careful taping at the edges where the cloth meets the baseboard. Any gaps allow drips through to the flooring.
Tile floors receive similar treatment. The grout lines can trap paint, making protection especially important. Canvas cloths taped at edges provide reliable protection.
Carpet requires extra care. Plastic sheeting goes down first, taped to baseboards to prevent any drips reaching carpet fibres. Canvas cloths over plastic provide the working surface. Paint on carpet is nearly impossible to fully remove, making prevention essential.
Anything not being painted adjacent to painted surfaces must be masked. Trim, door frames, window frames, light fixtures, electrical outlets, and switches are all taped and/or covered.
Quality painter’s tape, applied carefully, creates clean lines where painted surfaces meet unpainted surfaces. Cheap tape or rushed application can cause paint to bleed under the edges, requiring tedious cleanup or touch-up.
Proper masking takes time. Each window, door, and fixture needs attention. Light switches get removed or carefully masked. Outlet covers are removed and bagged with their screws. This tedious work prevents tedious problems later.
With protection in place, attention turns to the surfaces themselves. Every wall and ceiling needs inspection, and most need at least some repair.

Walk every wall, paying close attention to surfaces. What looks fine from across the room often reveals issues up close. Mark problem areas with painter’s tape to ensure nothing is missed during repairs.
Common issues include nail holes from pictures and decorations. Cracks along drywall seams and at corners. Nail pops where fasteners have pushed through. Dents and dings from furniture bumps. Previous repairs that weren’t done well.
Every issue needs to be addressed. Fresh paint doesn’t hide damage – it highlights it. Problems visible before painting are more visible after painting. Fix everything during prep.
Small holes – nail holes and similar – fill with lightweight spackle. Apply compound, let dry, sand smooth. One application usually suffices for small holes.
Larger holes require more work. Mesh tape bridges the hole and provides support. Joint compound applies over the mesh in multiple thin layers, each dried and sanded before the next. Rushing this process with thick single layers leads to visible repairs.
Cracks along seams need similar treatment. Paper or mesh tape prevents cracks from reopening. Multiple compound layers build smooth surfaces. Patient, careful work creates invisible repairs; rushed work creates visible repairs.
Nail pops occur as homes settle and move. Nails or screws used to hold drywall push through the surface, creating bumps. They’re extremely common in Fremont homes, especially those built on bay mud that continues settling for years.
Fixing nail pops means driving the fastener back below the surface (or adding a new screw nearby), then filling and sanding. A typical room might have a dozen nail pops; a whole house could have fifty or more. Each one takes individual attention.
Minor wall damage – small dents, shallow gouges, surface roughness – gets filled and sanded. The goal is smooth, even surfaces ready for paint. Every imperfection addressed now won’t show through the final finish.
Water stains require special attention. The stain itself is just discoloration, but the underlying issue matters. Was this a one-time event that’s been fixed, or an ongoing problem? Painting over active water intrusion is pointless – fix the source first.
Once water issues are resolved, stains need stain-blocking primer. Regular paint and regular primer allow stains to bleed through. Only dedicated stain-blocking products prevent the discoloration from showing in the final finish.
Other surface imperfections – texture damage, rough patches, failed previous finishes – need case-by-case evaluation. Some sand is smooth. Some need compound and sanding. Some need a complete removal and a fresh start. The right approach depends on the specific situation.
Beyond repairs, walls need to be prepared to accept paint properly. This includes cleaning, sanding, and, in some cases, applying putty or compound to larger areas.

Walls collect dust, dirt, and other contaminants that prevent paint adhesion. All walls should be at least dusted before painting. Many need more thorough cleaning.
Dusty walls get wiped down with dry cloths or tack rags. This removes surface dust that would otherwise mix with paint and compromise adhesion.
Kitchen walls near cooking areas need degreasing. Grease films are often invisible but absolutely prevent proper paint adhesion. TSP (trisodium phosphate) or degreasing cleaners remove these films. Skipping this step in kitchens virtually guarantees paint failure near stoves.
Bathroom walls may need mildew treatment. Any visible mildew must be killed and removed before painting. Mildew-killing products followed by thorough rinsing prepare surfaces for mildew-resistant paint.
Sanding serves two purposes: smoothing repairs and creating texture for adhesion on glossy surfaces.
Repaired areas need to be sanded smooth. Compound dries with a slight texture that shows through paint. Sanding creates a smooth surface that becomes invisible under paint.
Glossy existing paint needs scuffing so new paint can grip. The existing finish may look fine, but its smooth, shiny surface doesn’t provide adequate adhesion for new paint. Light sanding creates a tooth – microscopic texture that new paint grabs.
Full-wall sanding is rarely necessary unless the existing finish is in poor condition. Spot-sanding repaired areas and scuffing any glossy surfaces typically suffices.
Sometimes walls need more than spot repairs. Surfaces with many small imperfections might benefit from skim coating – a thin layer of compound across the entire surface, then sanded smooth.
Multiple thin coats are more effective than a single thick coat. Thin layers dry faster, shrink less, and sand more easily. Building up through layers creates smooth results.
Each layer dries completely before sanding. Sanding wet or tacky compound makes a mess. Patient waiting between coats improves final results.
The sanded surface should be uniformly smooth and ready for primer. Running a hand across the wall should feel even, with no ridges, lumps, or texture changes.
Many Fremont homes have textured walls and ceilings. Repairs on textured surfaces require matching the surrounding texture, or they stand out.

A smooth patch on an orange peel wall stands out glaringly. Even perfect repair work becomes visible if the texture doesn’t match. Texture matching makes repairs disappear.
Poor texture matching is one of the most obvious signs of amateur work. It indicates that the painter didn’t care about detail or didn’t have the skill to match textures. Either way, it undermines the project’s overall quality perception.
Orange peel is common, characterised by small bumps resembling the skin of an orange. Knockdown texture has larger patterns partially flattened. Popcorn (acoustic) ceiling texture has a heavy, irregular surface. Smooth walls have no applied texture.
Fremont homes have all of these. Newer construction in Warm Springs tends toward smooth or light orange peel. Older homes in Niles and Centerville often have heavier textures. Knowing what you have guides the matching approach.
Matching texture requires the right tools and techniques. Spray texture for orange peel and similar patterns. Hand-applied techniques for knockdown. Specialized products for popcorn ceilings (though many homeowners choose to remove rather than match this dated texture).
Feathering edges – tapering the repair gradually into surrounding surfaces – helps hide transitions. Even perfect texture matching can reveal abrupt edges. Gradual blending makes repairs invisible.
Primer is a separate product from paint, designed to prepare surfaces for topcoats. Knowing when primer is necessary prevents problems.

Several situations require a primer. Bare drywall – new construction or repairs – always needs primer. The paper surface absorbs paint unevenly without primer, creating visible differences in sheen and color.
Stains require a stain-blocking primer, as discussed earlier. Dramatic color changes benefit from a tinted primer to reduce the number of coats needed. Going from dark colors to light colors particularly benefits from primer – without it, you might need three or four topcoats instead of two.
Previously glossy surfaces benefit from bonding primer if sanding alone doesn’t provide adequate tooth. Some surfaces – certain panelling, previously lacquered woodwork – need specialized primers for any paint to stick.
General-purpose primer seals surfaces and promotes adhesion. It’s the standard choice for new drywall, repairs, and most routine applications.
Stain-blocking primer prevents discoloration from bleeding through. It’s necessary for water stains, smoke damage, ink marks, and similar issues. Standard primer doesn’t block stains effectively.
Bonding primer adheres to difficult surfaces that regular primer can’t grip. Slick surfaces, certain plastics, and previously finished surfaces sometimes need a bonding primer for topcoats to succeed.
Skipping primer where it’s needed causes problems later. Stains that bleed through mean repainting. Poor adhesion means peeling. Inadequate coverage means extra topcoats. Primer prevents all of these.
One coat of an appropriate primer typically suffices, though severe stains may require two coats of stain blocker. Prime and let dry completely before topcoating. Rushing paint over tacky primer compromises everything.
Different rooms face different conditions and need different prep approaches. One-size-fits-all preparation doesn’t work.
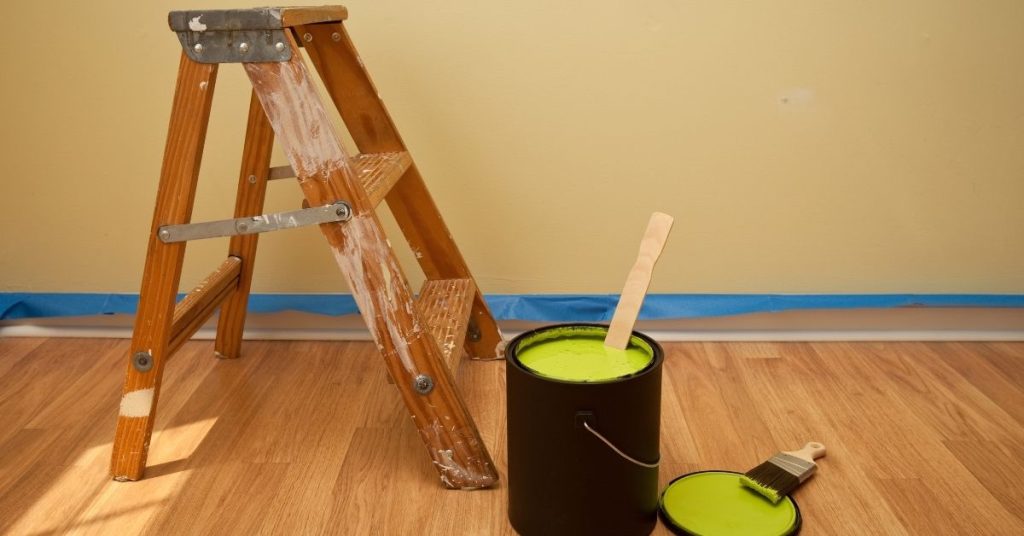
These rooms typically have standard prep requirements – repair damage, sand repairs, clean surfaces, and prime as needed. They typically don’t face special challenges.
Adult bedrooms with light wear may require minimal repairs. Kids’ bedrooms often require more extensive patching due to years of wear and tear. Living rooms vary based on traffic patterns and family habits.
Kitchens require thorough degreasing – this step is mandatory, not optional. Any grease on the walls prevents paint adhesion. Near stoves and ranges, multiple cleaning passes may be necessary.
Cabinets require separate, more intensive preparation if being painted. Degreasing, sanding, priming – cabinet prep is its own specialized process.
Dining rooms vary. Formal dining rooms used infrequently may need minimal prep. Eat-in kitchens used daily may have more wall damage and require more repairs.
Bathrooms need mildew inspection and treatment. Any visible mildew must be killed and removed. Even without visible mildew, surfaces should be cleaned with mildew-preventing products.
Moisture-resistant primer is appropriate for bathrooms, even on surfaces without visible stains. The ongoing moisture exposure benefits froma primer designed for these conditions.
Laundry rooms face similar moisture considerations, though typically less severe than bathrooms.
High-traffic zones typically show more wall damage – scuffs, marks, dents from bumped furniture. Expect more repair work in hallways than in occasional-use rooms.
Stairways combine high traffic with difficult access. Walls along stairs often show significant wear and need thorough repair. The difficulty of working in stairways makes thorough prep even more important – you don’t want to return to fix problems in these challenging spaces.
Understanding how long preparation takes helps set realistic expectations for project duration.

A typical room in decent condition might require 2-4 hours of prep work: protection setup, minor repairs, sanding, and cleaning. Rooms with extensive damage or special requirements may require a full day or more for preparation.
Whole-house preparation spans multiple days for most homes. The first day or two of a multi-day project often focus primarily on prep, with painting beginning once surfaces are ready.
Single-room projects have proportionally higher prep time. Setup is from scratch: protection materials deployed, equipment positioned, and surfaces accessed. This overhead exists whether doing one room or ten.
Whole-home projects become more efficient after initial setup. Once drop cloths are positioned and equipment is in place, moving from room to room is faster than starting fresh.
Extensive repairs are the biggest time factor. A house with significant wall damage needs hours of patching, drying, sanding, and re-patching. This work can’t be rushed without compromising quality.
High ceilings add time, as ladder work takes longer. Many trim and architectural details add to masking time. Heavy furniture that’s difficult to move adds handling time. Poor existing conditions – previous paint failures, extensive contamination – add cleaning and removal time.
Understanding common mistakes helps you avoid them – whether doing work yourself or evaluating contractors.

Fresh paint highlights damage rather than hiding it. Every crack, hole, and imperfection visible before painting becomes more visible after painting. Skipping repairs ensures disappointing results.
This mistake often comes from hoping paint will cover flaws. It won’t. If anything, paint makes imperfections more obvious. Fix everything during prep.
Dirty surfaces cause adhesion failure. The paint may appear fine initially, but it can peel or flake as the weak bond fails. By then, the cause isn’t obvious – the dirt is hidden under failed paint.
Take cleaning seriously, even when the walls look clean. Dust accumulates invisibly. Kitchen grease films are often invisible. The effort invested in thorough cleaning pays off in lasting adhesion.
Prep takes time. The compound needs to dry between coats. Sanding creates dust that needs cleaning. Primer needs to cure before topcoats. Rushing any of these steps shows in the results.
The temptation to hurry is strong – prep feels like a delay before “real” painting begins. Resist this temptation. Patient, thorough prep creates the foundation for excellent results. Rushed prep creates the foundation for disappointment.
Cheap painter’s tape bleeds and leaves residue. Thin drop cloths tear and allow drips through. The wrong primer fails to block stains or provide adhesion. Inadequate spackle shrinks and cracks.
Quality prep materials cost more but perform properly. The few dollars saved on cheap tape become hours spent cleaning bleed-through. The savings from thin drop cloths turn into carpet-cleaning bills. Use materials appropriate for the job.
Professional painters approach preparation systematically. Understanding their methods helps you recognize quality work.

Professional painters know from experience that prep determines results. They’ve seen what happens when prep is rushed or skipped. Their reputations depend on work that looks good and lasts, which requires thorough preparation.
Professionals also typically warrant their work. Failures due to poor prep become their problem. This accountability motivates doing prep right the first time rather than hoping problems don’t develop.
Professionals have better equipment for prep work. Commercial-grade sanders for efficient, even sanding. Quality spray equipment for texture matching. Professional-grade compounds and primers that outperform consumer products.
Their techniques reflect experience. They know how many compound coats different damage require. They know drying times for various products. They know which primers work for which situations. This knowledge comes from doing the work thousands of times.
Well-prepared surfaces hold paint longer. The strong bond between a properly prepared surface and correctly applied paint lasts for years of normal wear. Touch-ups needed are minimal.
Poorly prepared surfaces need frequent attention. Peeling requires repair. Failed adhesion requires repainting. Problems compound over time. The “savings” from skipped prep become ongoing maintenance costs.
Homeowners can help preparation go smoothly with some advance work.
Clear small items from surfaces – knick-knacks, photos, items on shelves near walls being painted. These items need to be moved anyway; doing it yourself ensures they’re handled carefully and end up where you want them.
Move or secure valuable and irreplaceable items. Painters are careful, but accidents happen. Anything you’d be devastated to lose should be kept in a completely safe place.
Ensure access to all rooms being painted. Clear paths through the house for moving equipment. Provide parking near the entrances for unloading supplies.
Wall art, mirrors, and decorations should come down. Window treatments that might be affected should be removed. Electronics near painting areas should be moved or covered.
Fragile items, collectables, and irreplaceable objects should go somewhere completely protected – another room, a closet, off-site if necessary. Don’t rely on plastic covering for things you can’t afford to damage.
Communicate your schedule and constraints. Painters can work around needs you explain; they can’t accommodate needs they don’t know about.
Create a staging area for displaced items. Know where furniture will go, where boxes will stack, and how traffic flow will be managed during the project. Planning prevents chaos.
Ask questions before work begins, not during. Understanding the process helps you mentally and practically prepare.
Local factors affect how painting projects proceed. Understanding them helps with planning.
Preparation and painting interweave. A room prepared one day gets painted the next. Prep in one room proceeds while paint dries in another. Understanding this flow helps you plan around the work.
The first day or two often focus heavily on prep. Don’t expect freshly painted rooms immediately – foundation work comes first. Quality results require this patience.
Vacant homes allow more aggressive scheduling. Everything can happen simultaneously across multiple rooms. No coordination is required for daily life.
Occupied homes require phased approaches. Rooms must be returned to usable condition each evening. Bedrooms and bathrooms should operate on regular schedules. Work proceeds room by room rather than whole-house at once.

Local painters know local conditions. They’ve worked on Fremont homes for years. They know the typical wall conditions, common problems, and best approaches for homes built on bay mud.
Local painters are accountable locally. Their reputation matters in the community. They’ll see you at local businesses and events. This accountability motivates quality work, including thorough preparation.
Preparation is where quality painting projects are won or lost. The time invested in protecting your home, repairing surfaces, cleaning walls, and priming properly creates the foundation for results that look great and last for years.
Don’t accept shortcuts on preparation. Contractors who promise fast work often achieve it by skipping prep – and deliver results that fail quickly. Quality prep takes time. That time is an investment in lasting satisfaction.
Fremont Painting Pros serves homeowners throughout the Tri-City area – Niles, Warm Springs, Mission San Jose, Centerville, Glenmoor, and beyond. We invest the time preparation requires because we stand behind our work.
Call us or fill out the contact form to discuss your project. We’ll explain our process and show you why thorough preparation makes all the difference.
Fremont Painting Pros – your local interior painting experts.


